Pick your photos and FlightPlus does the rest, identify the flight, edit, frame, and publish. Here's the whole flow, step by step.
1
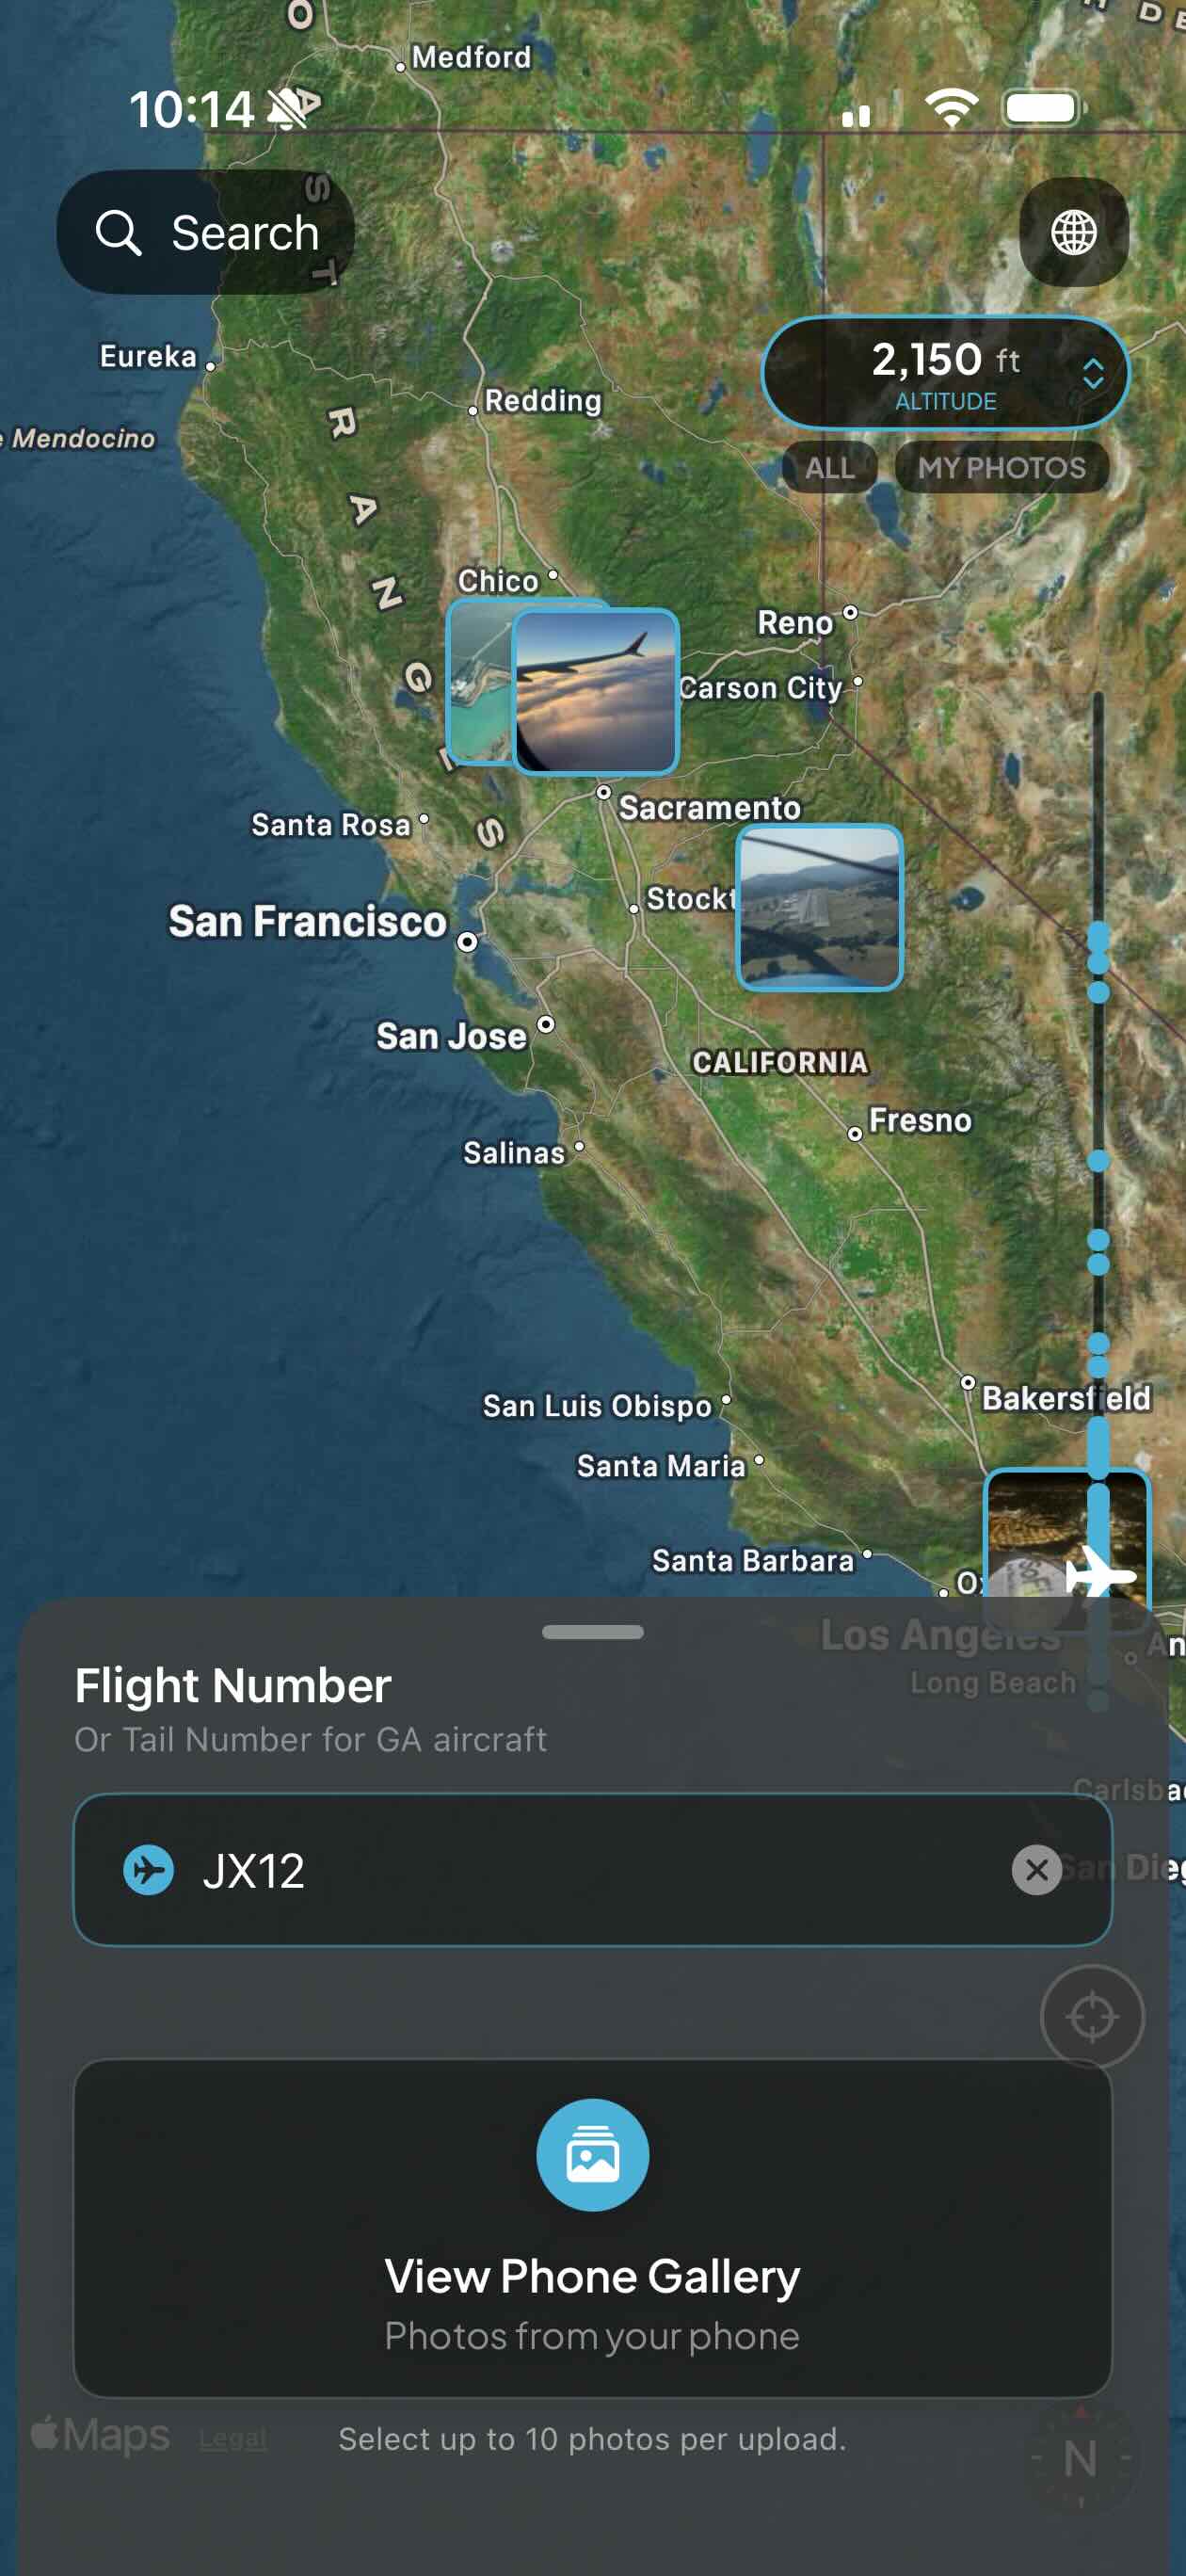
Add Your Photos
On the map page, enter your flight number (or tail number for GA aircraft), then tap "View Phone Gallery" and pick up to 10 photos per upload.
Note: Flight numbers can be searched up to 10 years back.
2
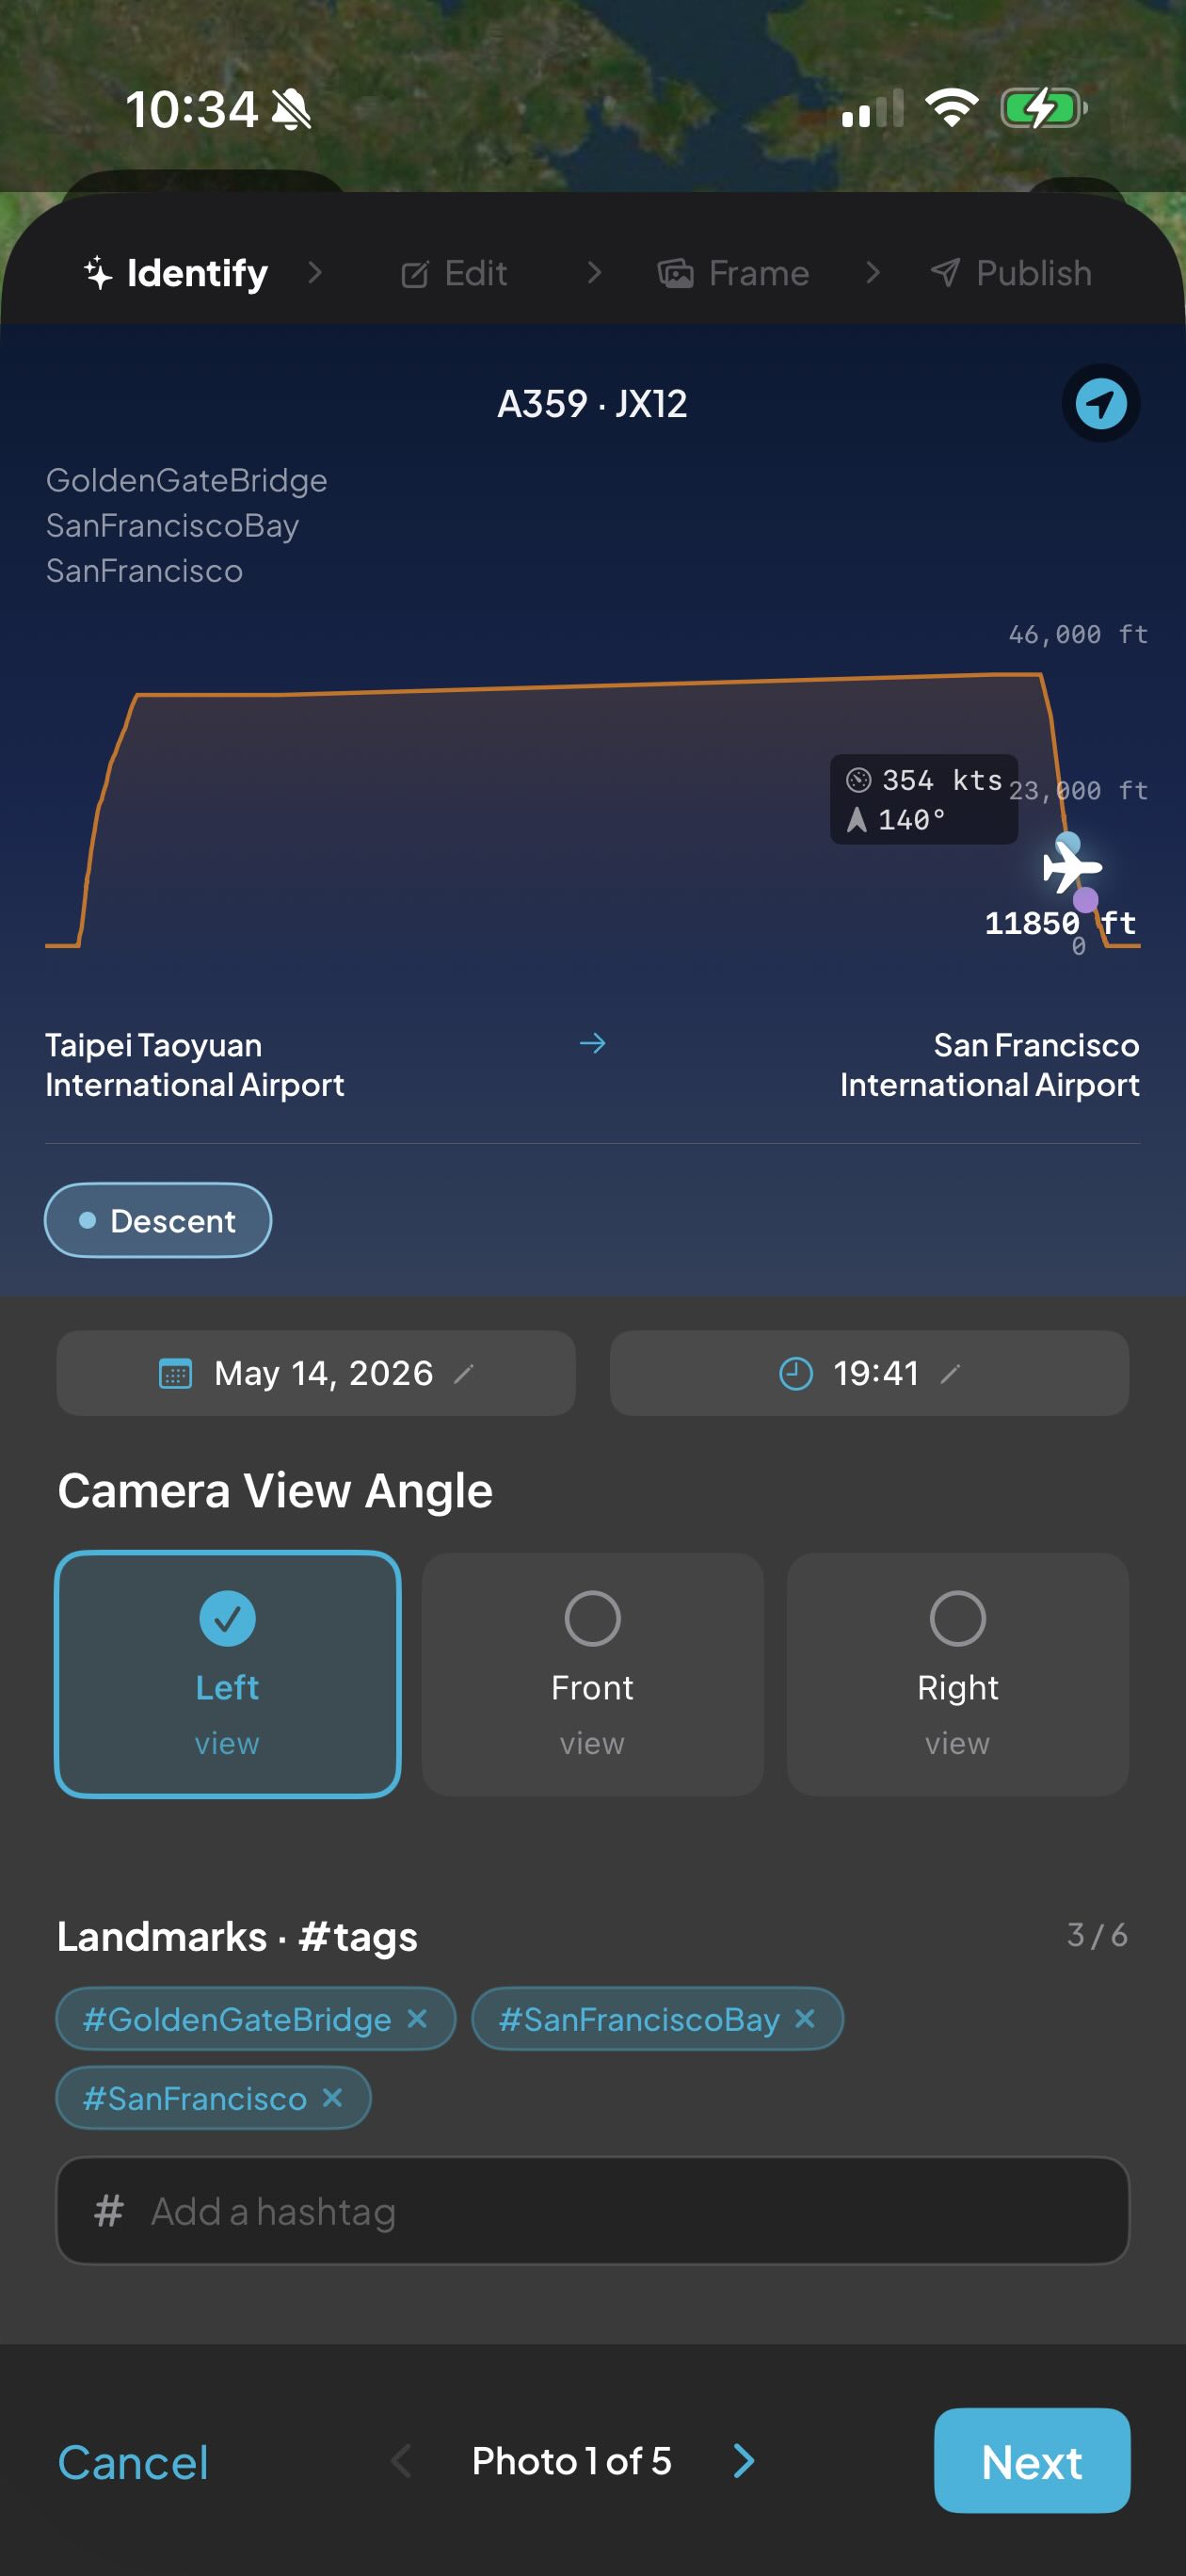
Identify the Flight
FlightPlus matches each photo to your flight and fills in altitude, speed, heading, and landmark tags automatically. Just pick the camera view, Left, Front, or Right.
3
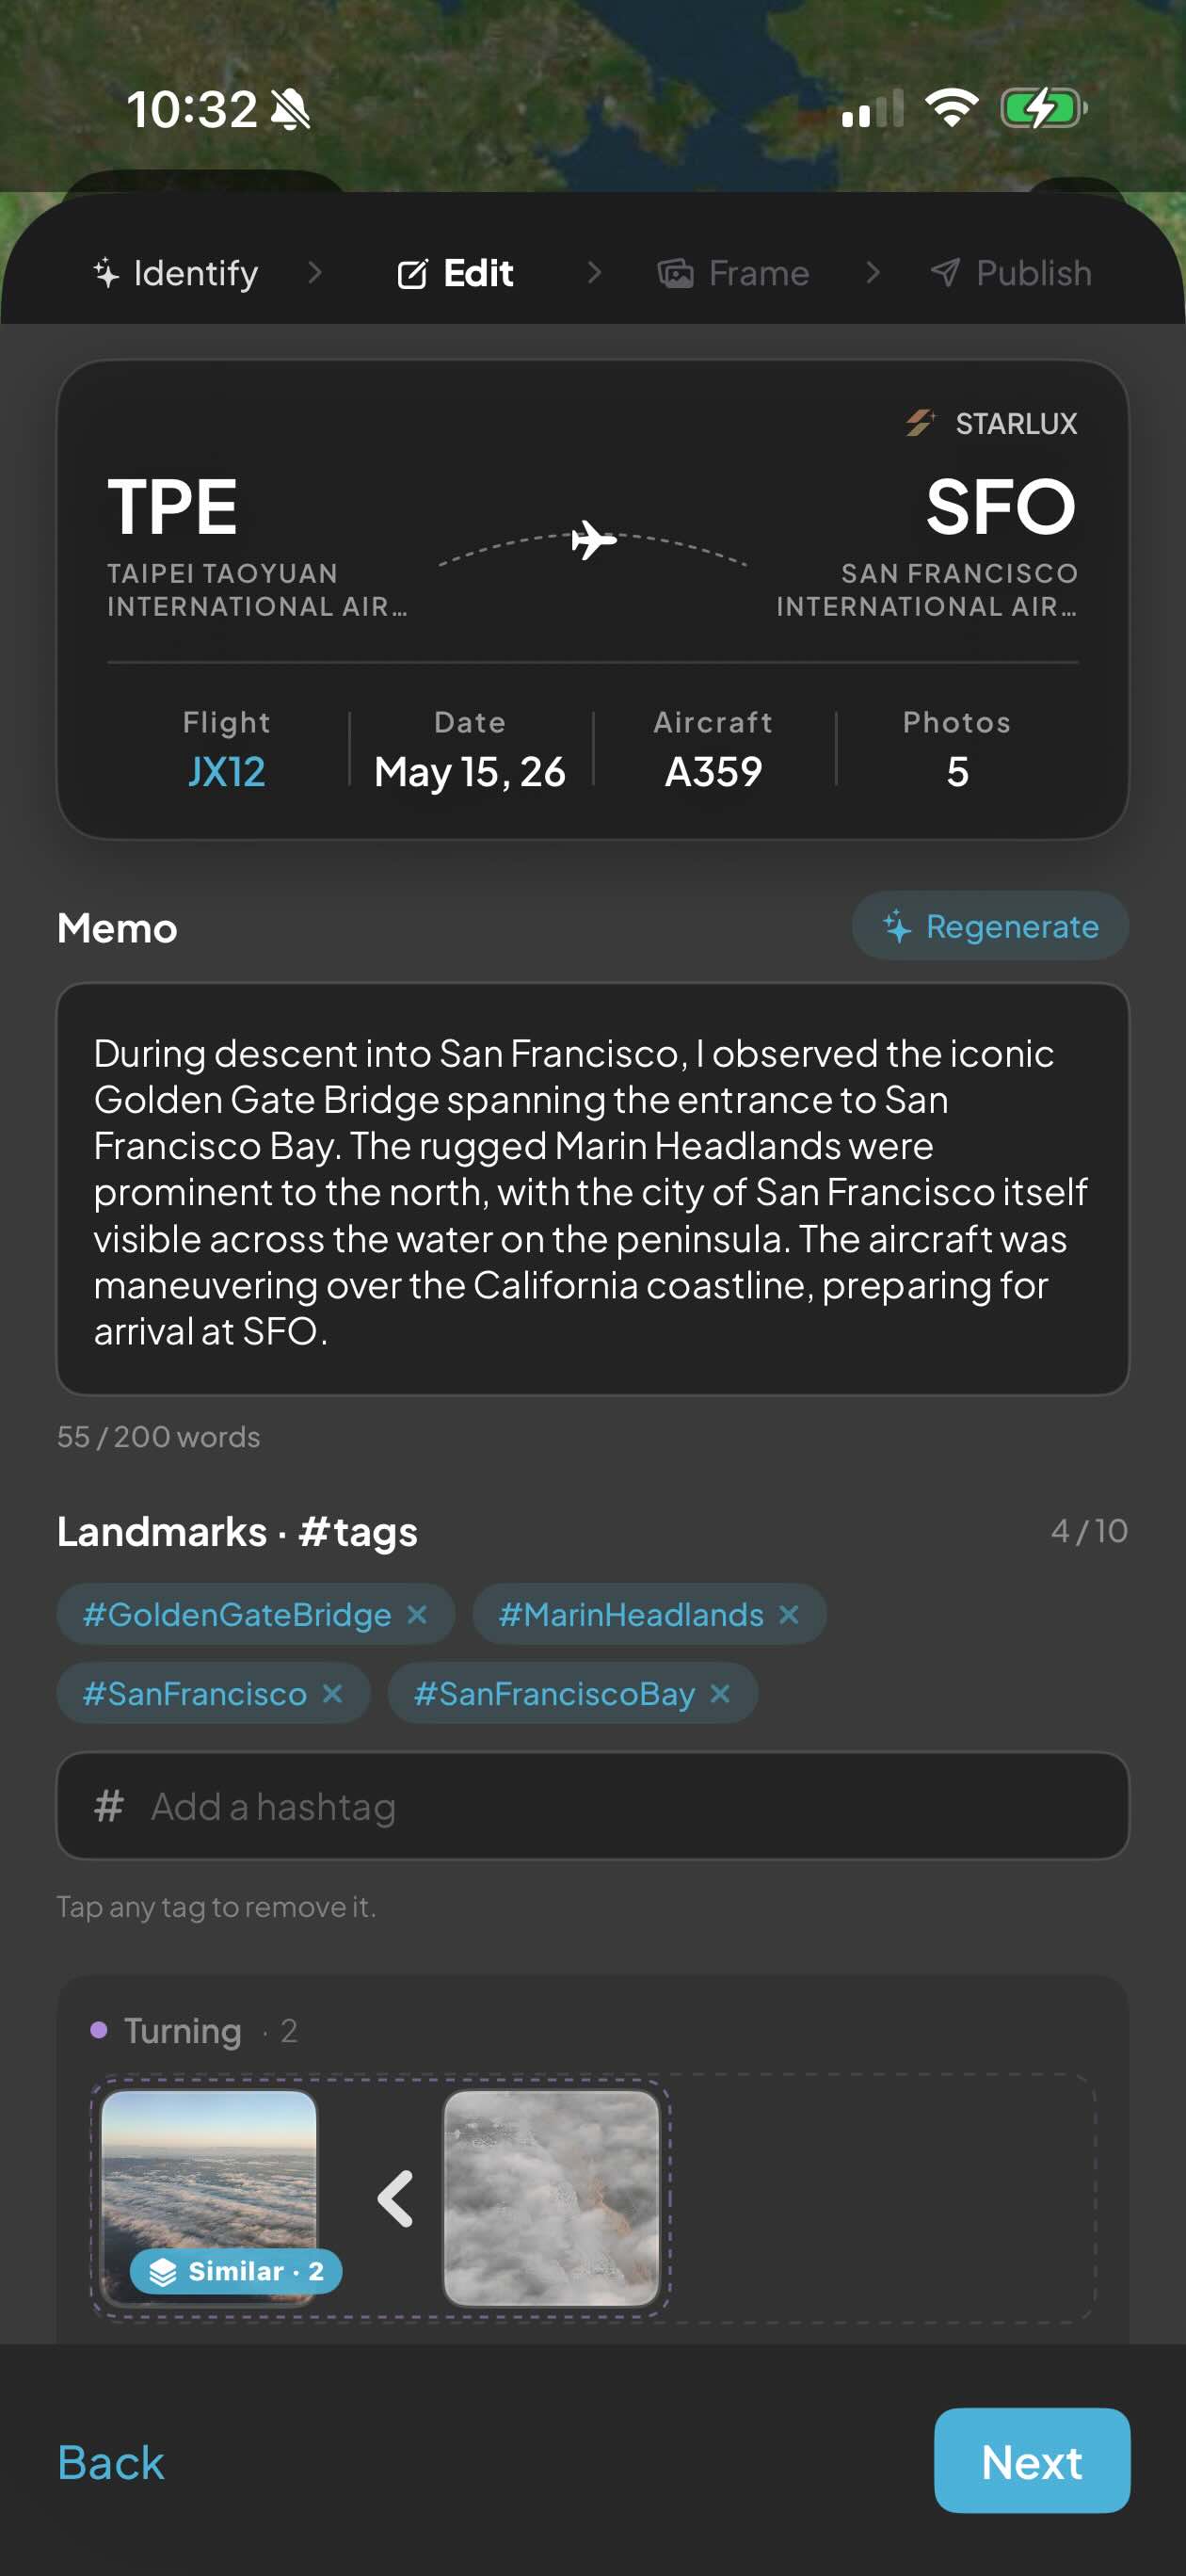
Edit Your Story
Review an AI-written memo of your journey, fine-tune the #tags, and let FlightPlus group similar shots by flight phase. Tap "Regenerate" for a fresh take.
4
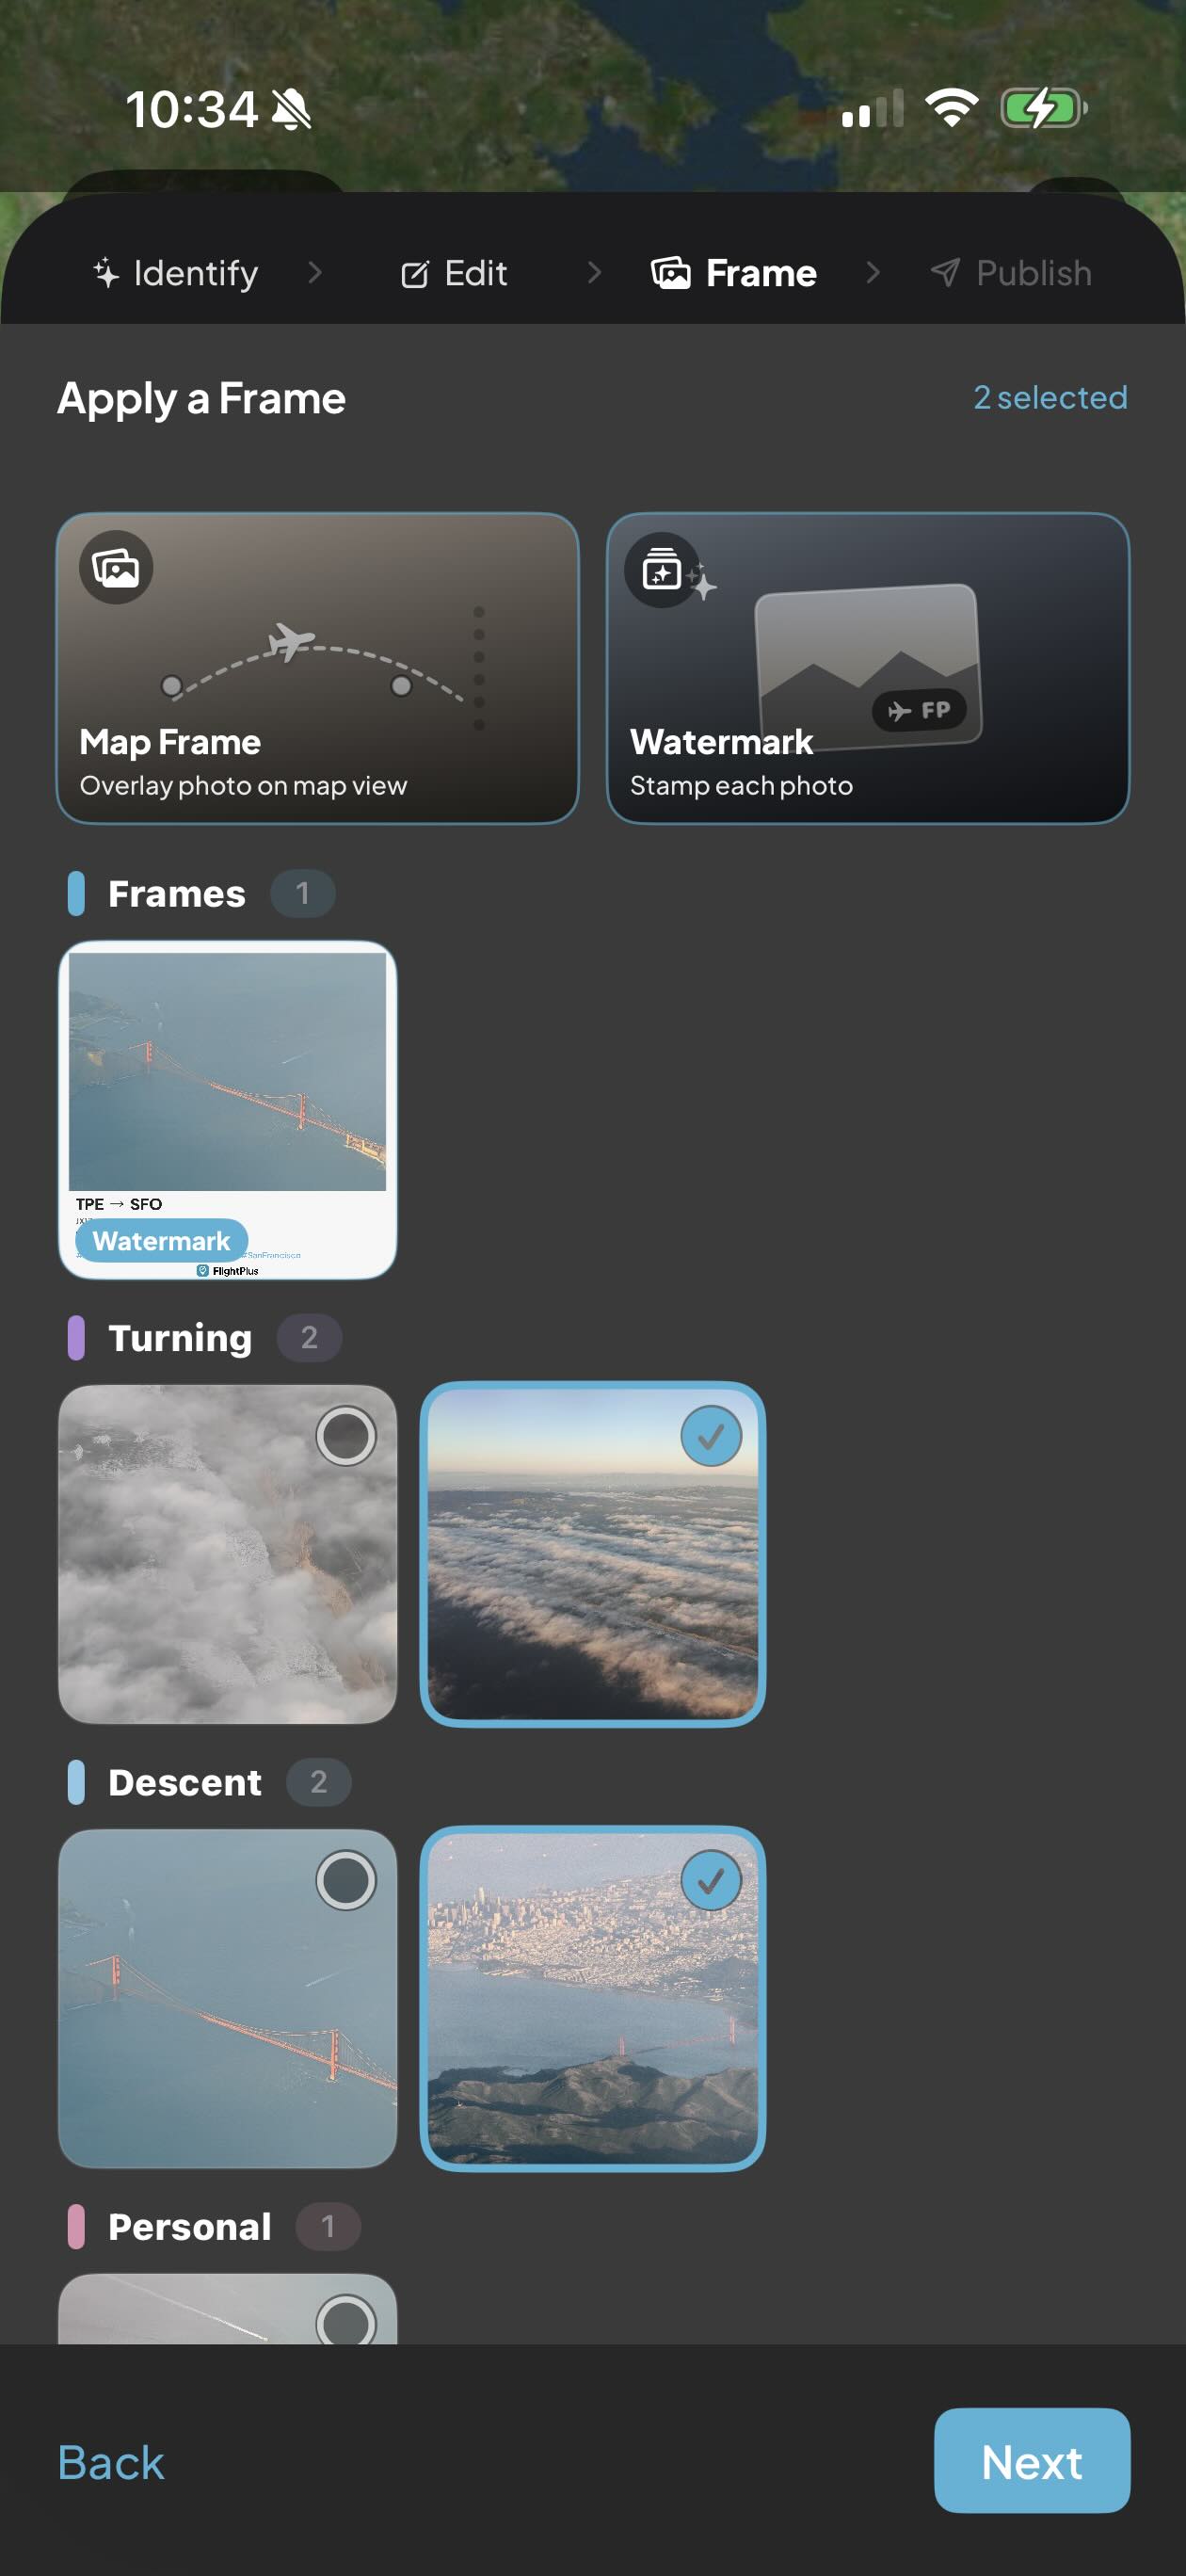
Frame Your Photos
Add a Map Frame to overlay a photo on its route, or stamp a Watermark. Choose exactly which photos get framed, perfect for sharing.
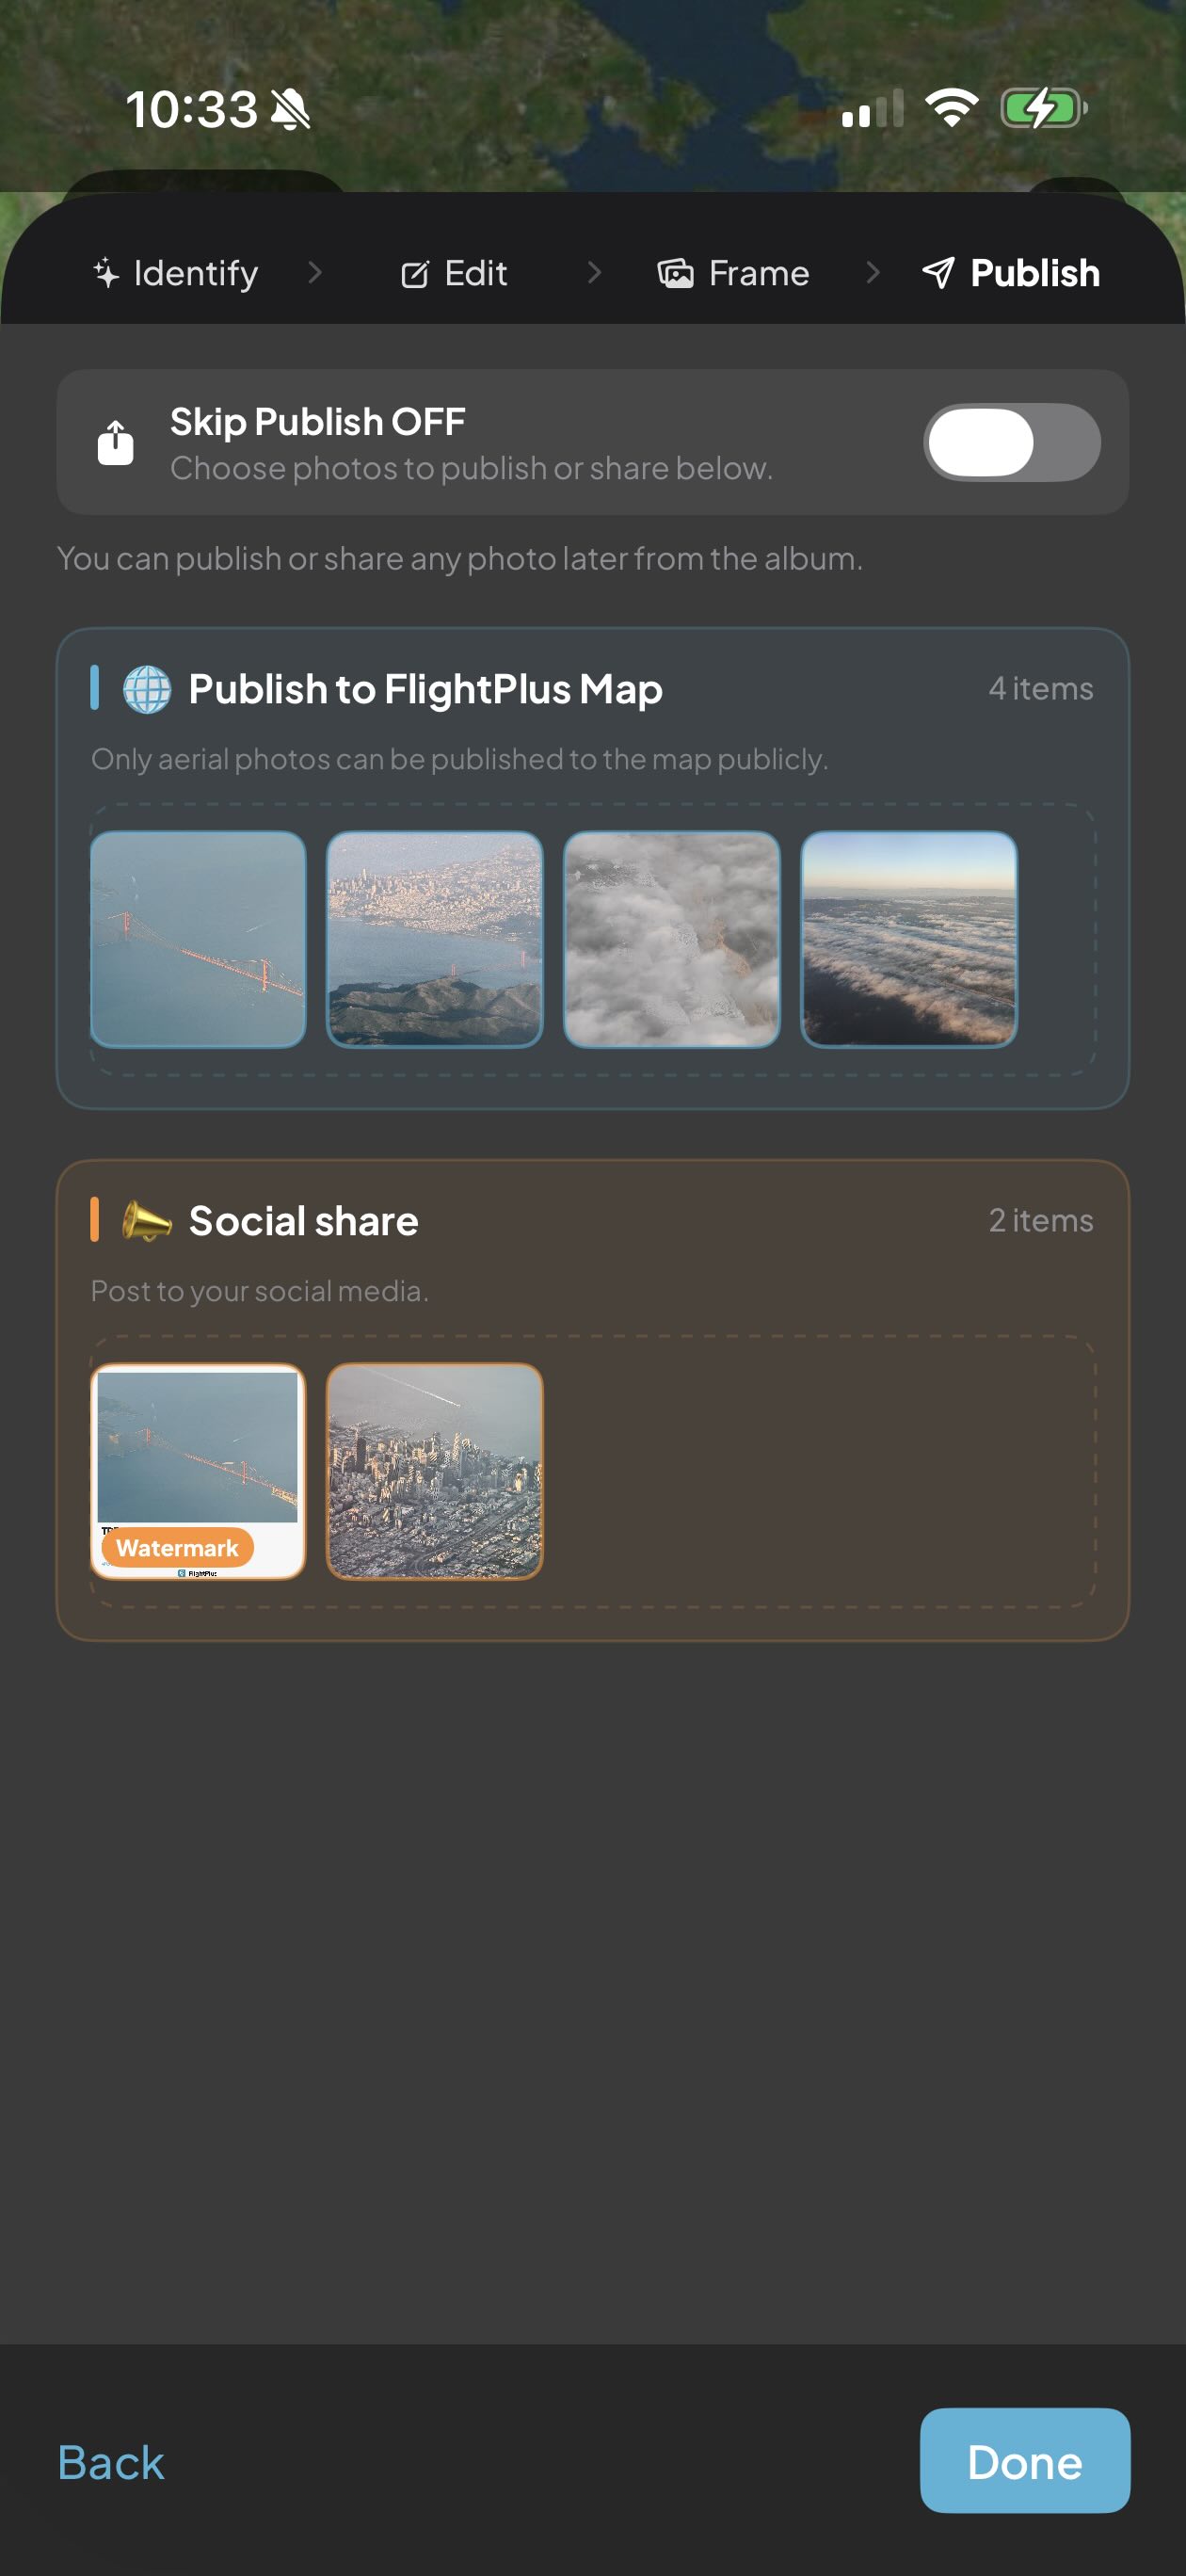
5
Publish & Share
Choose photos to publish to the FlightPlus map or share to social media, or skip and decide later. Tap "Done" to finish your album.
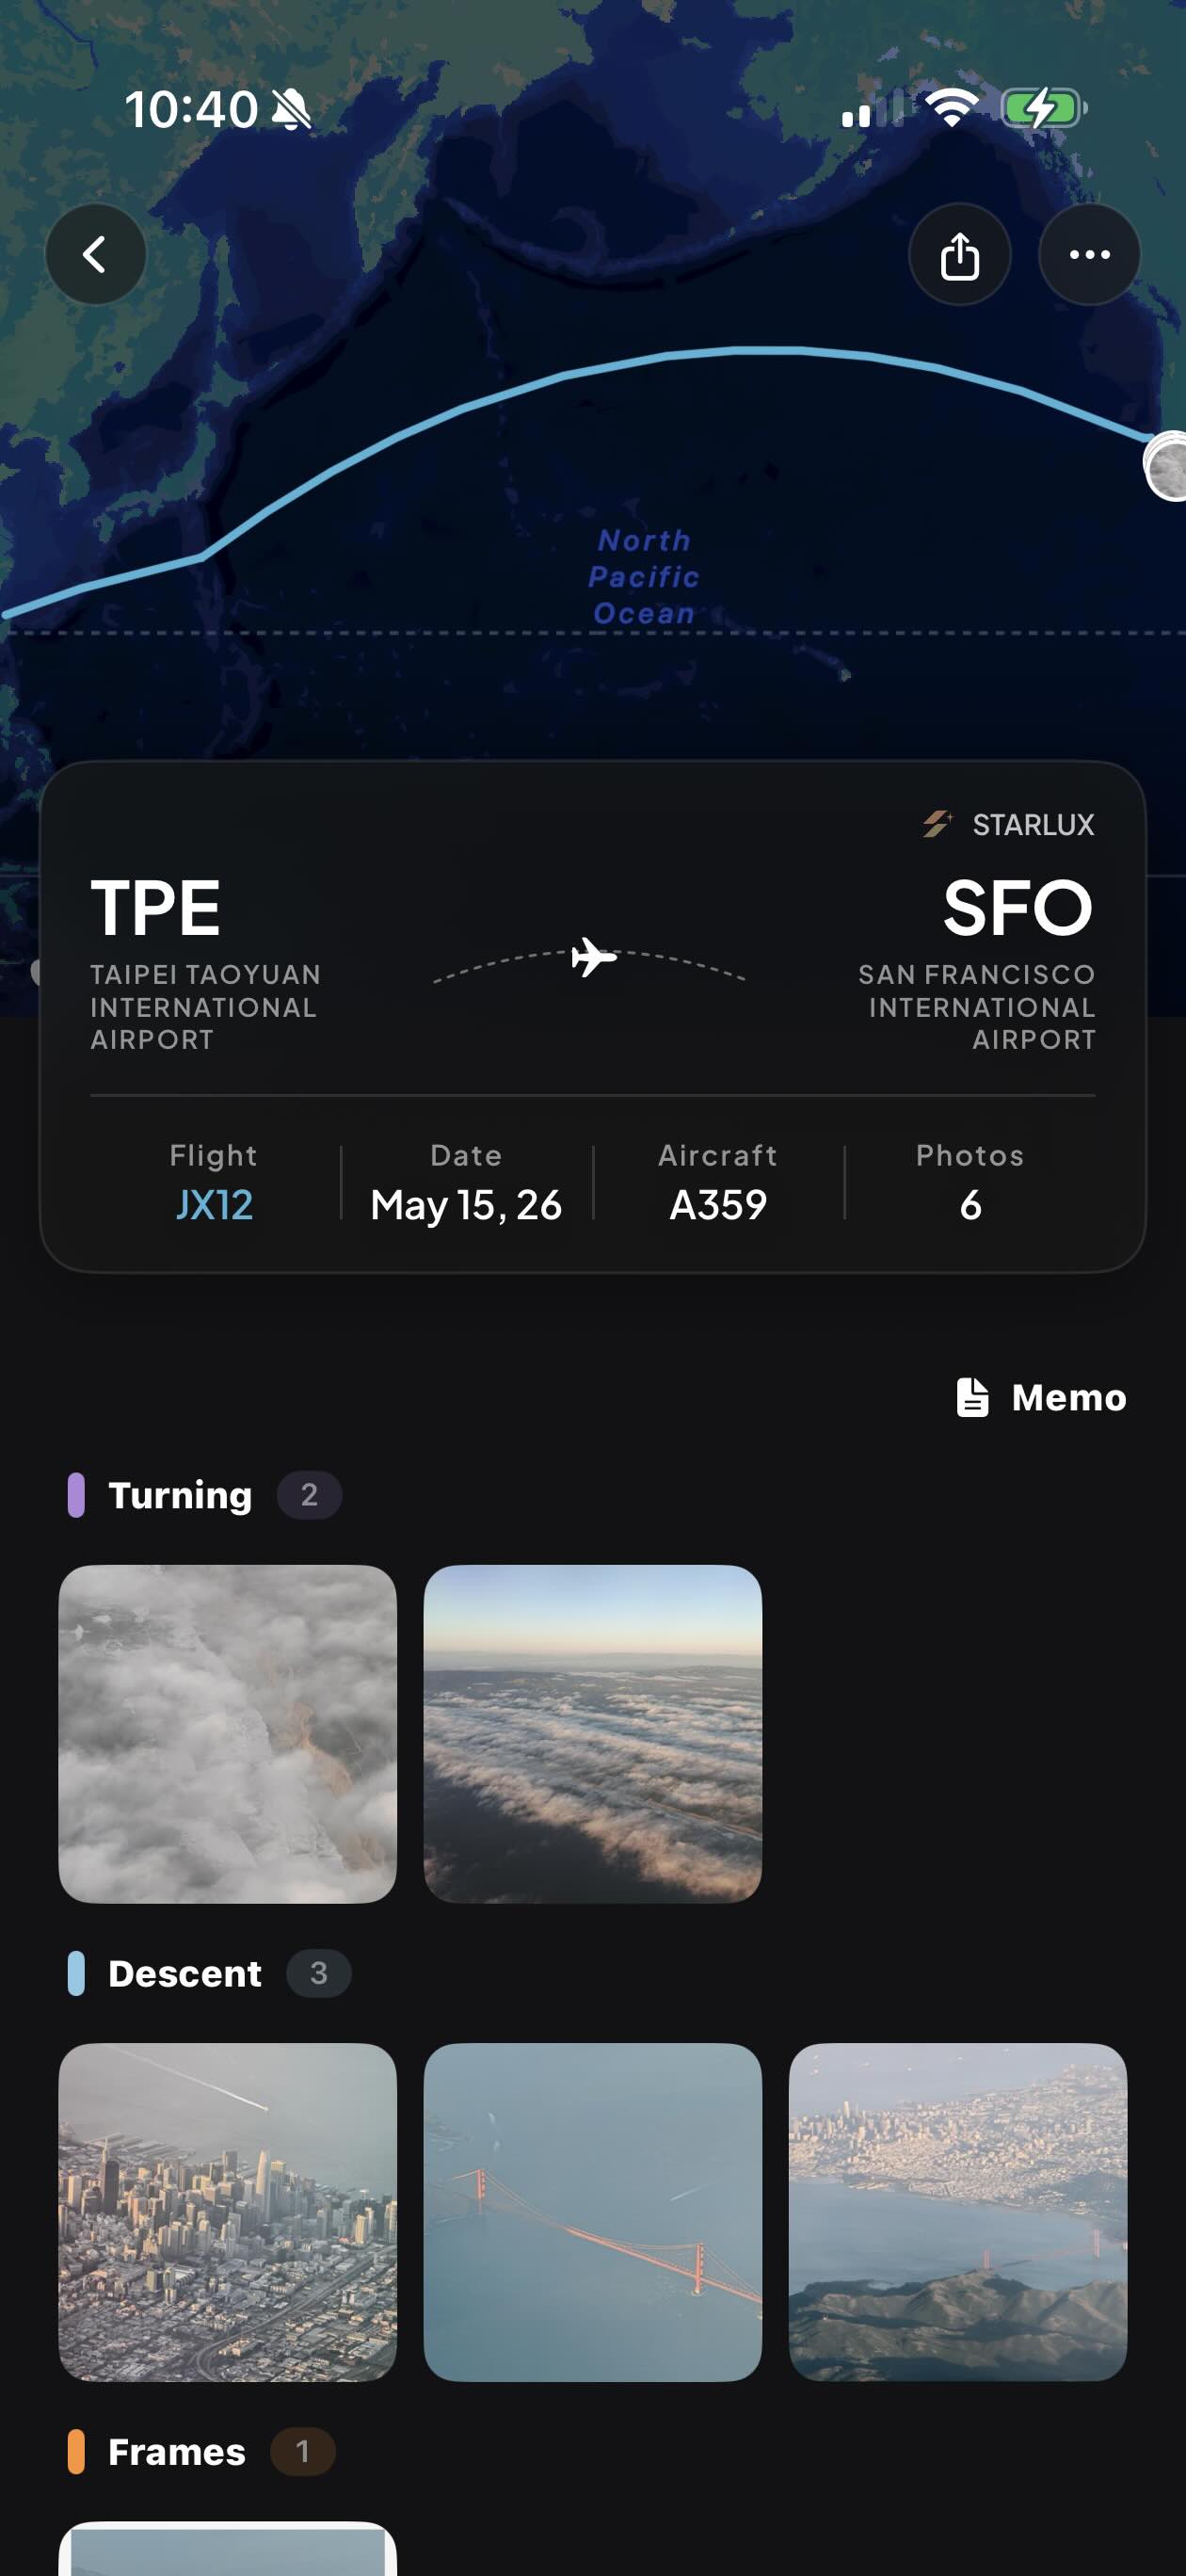
6
Your Flight Album
Every flight becomes a clean album, route map, flight stats, and your photos auto-grouped by phase like Turning and Descent.
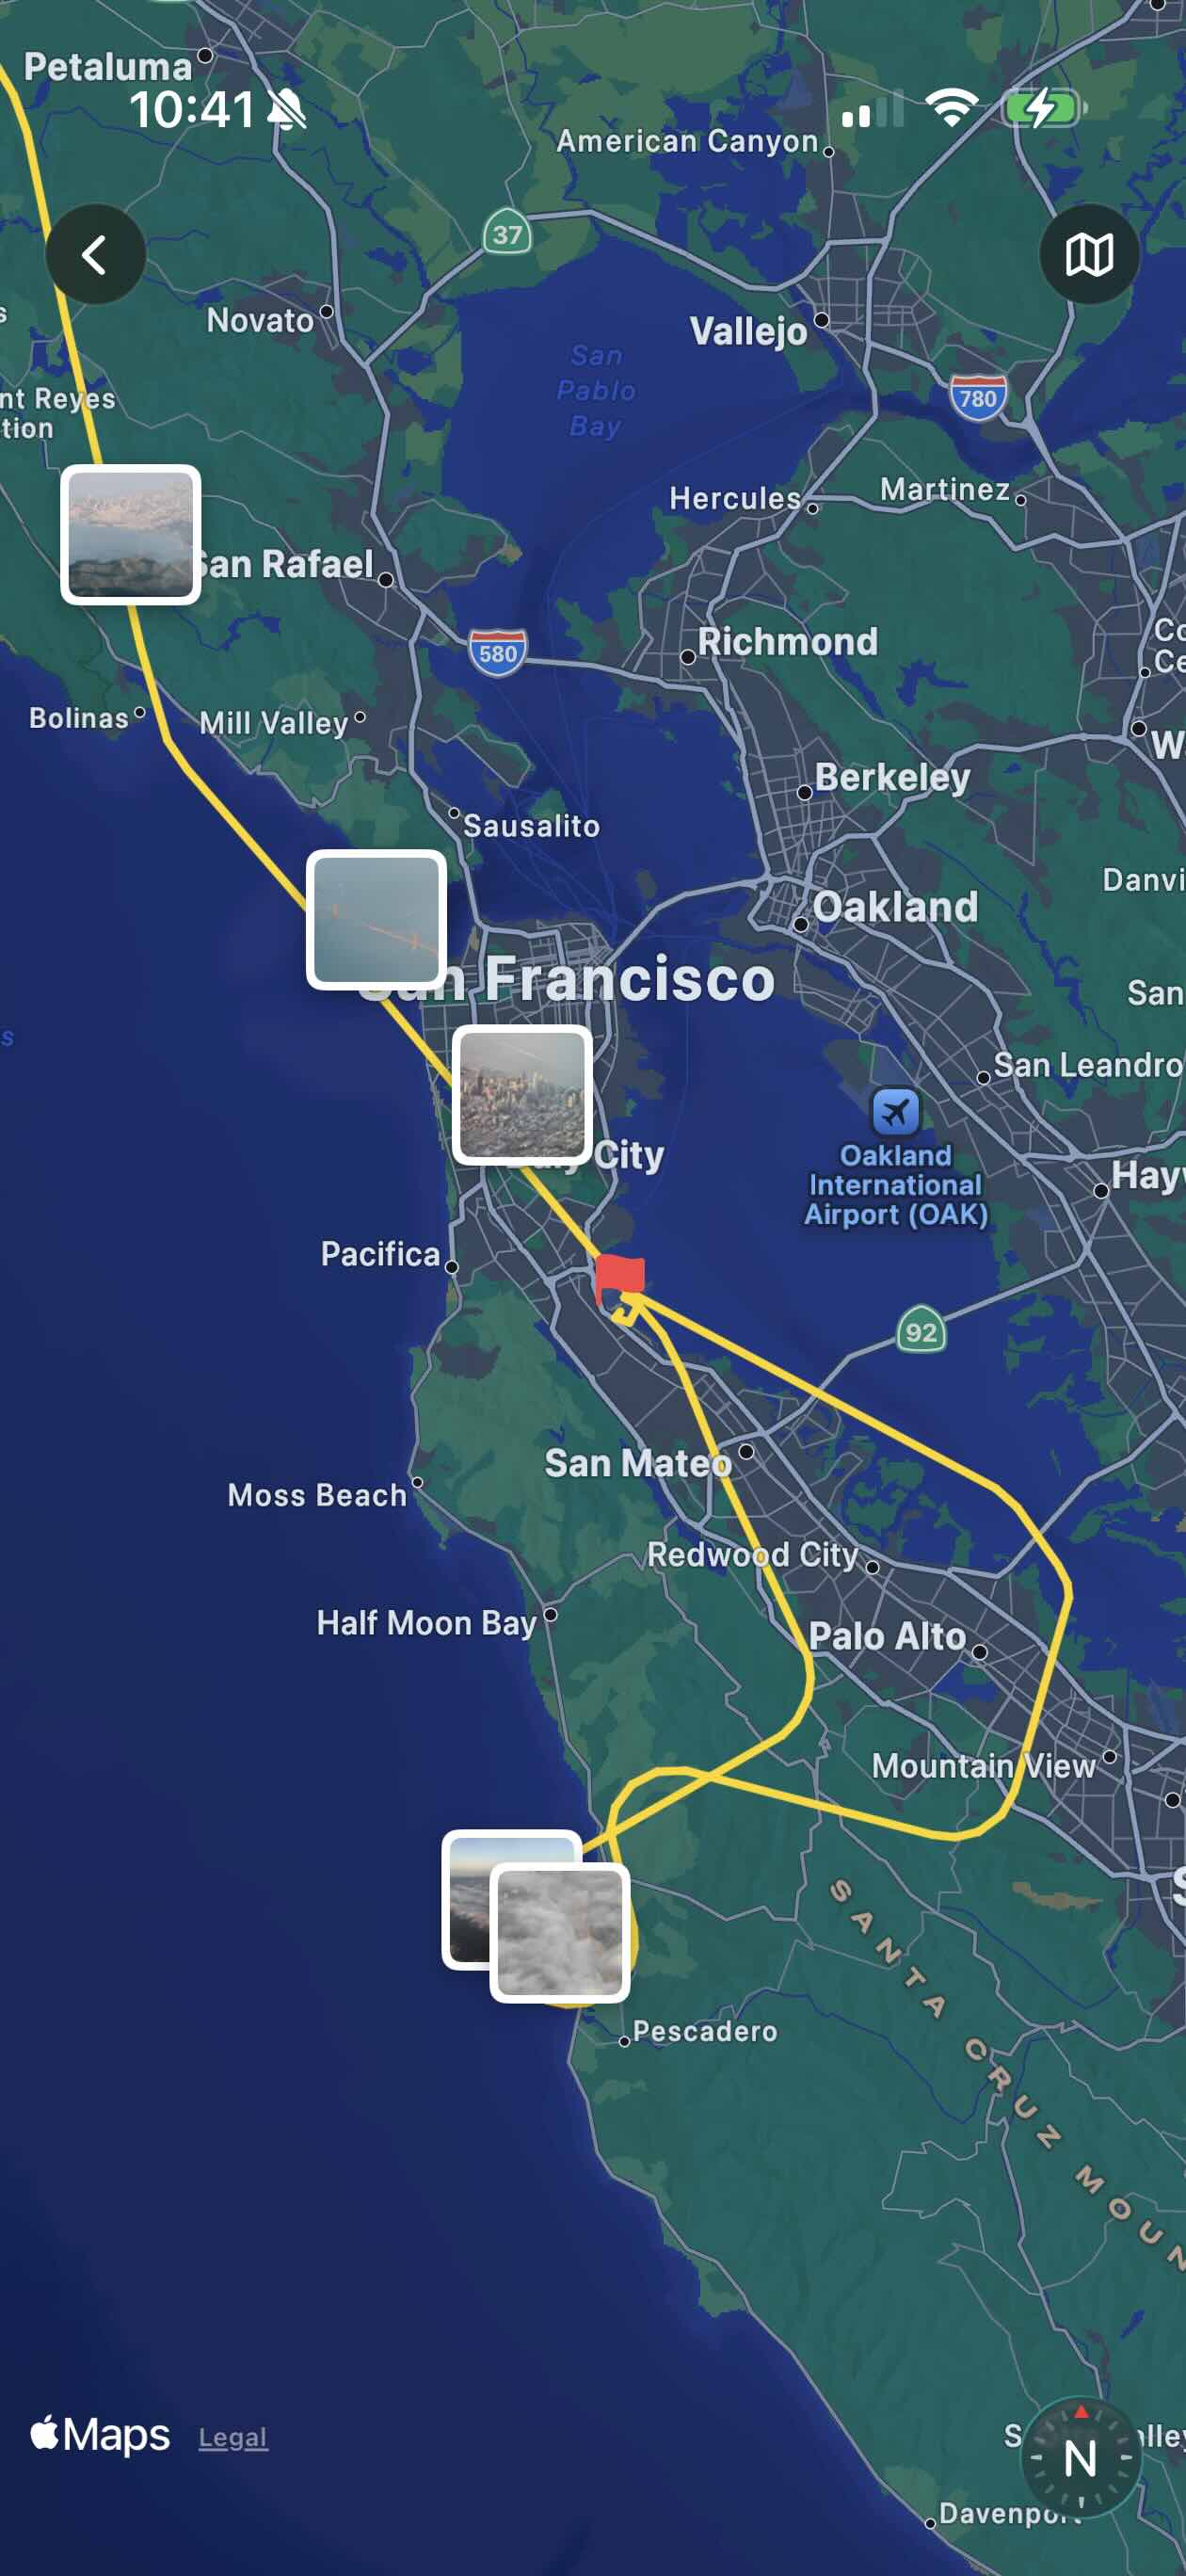
7
Pinned Along the Route
See each photo dropped exactly where it was taken along your flight track. Tap any pin to relive that moment of the journey.
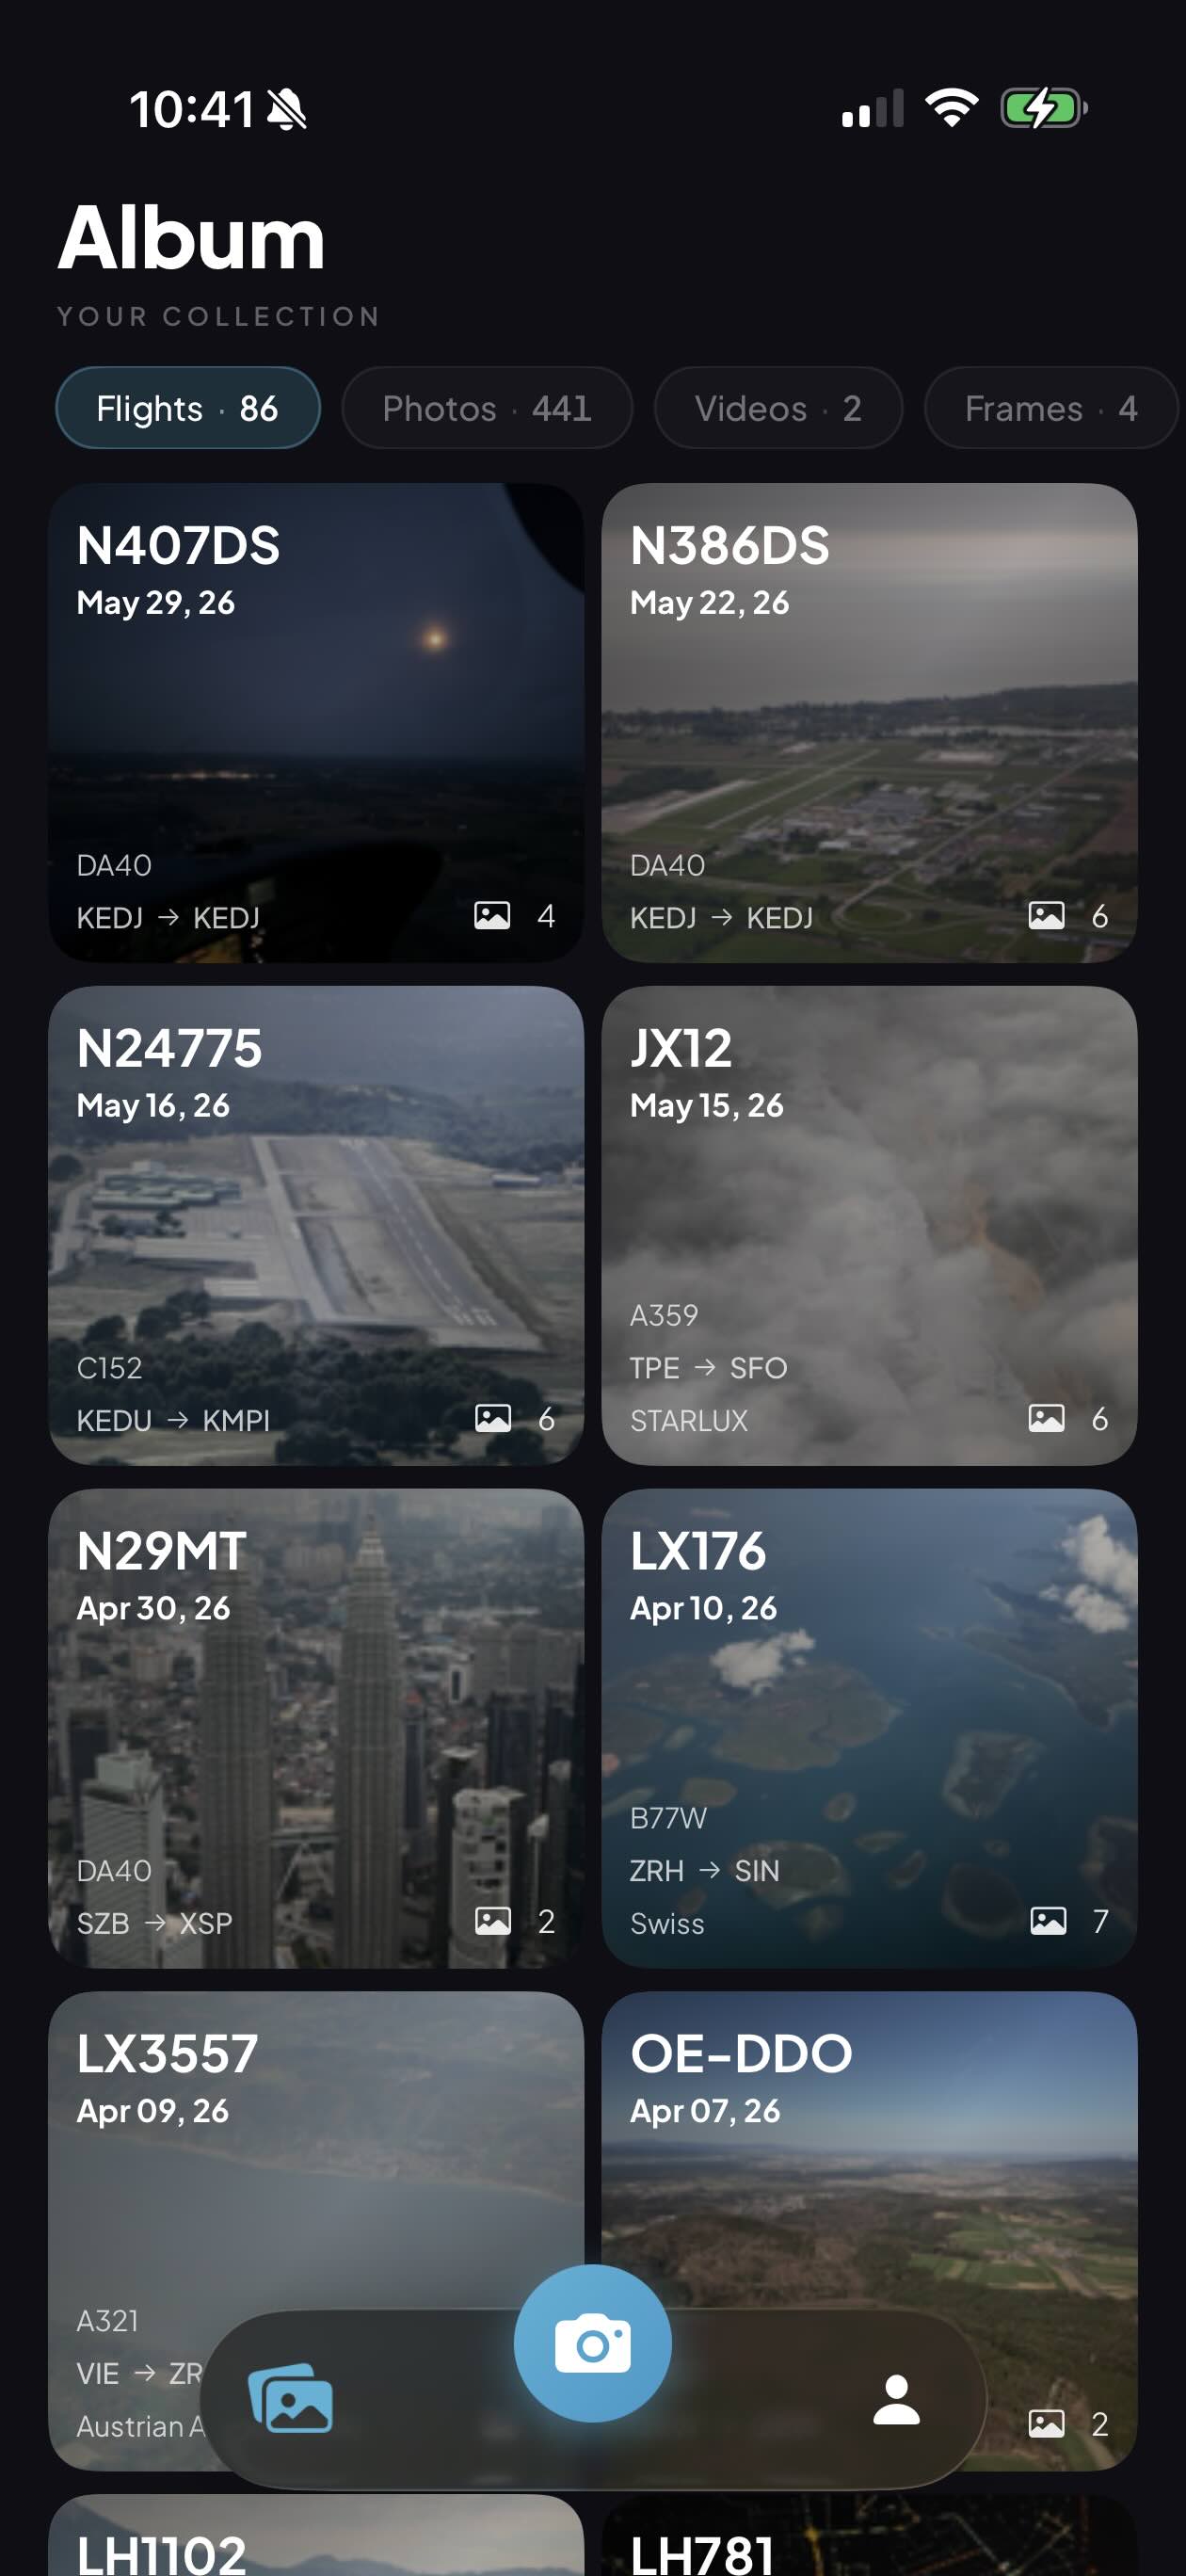
8
Your Flight Library
Browse your whole collection, every flight, photo, video, and frame in one place, neatly sorted by date.
9
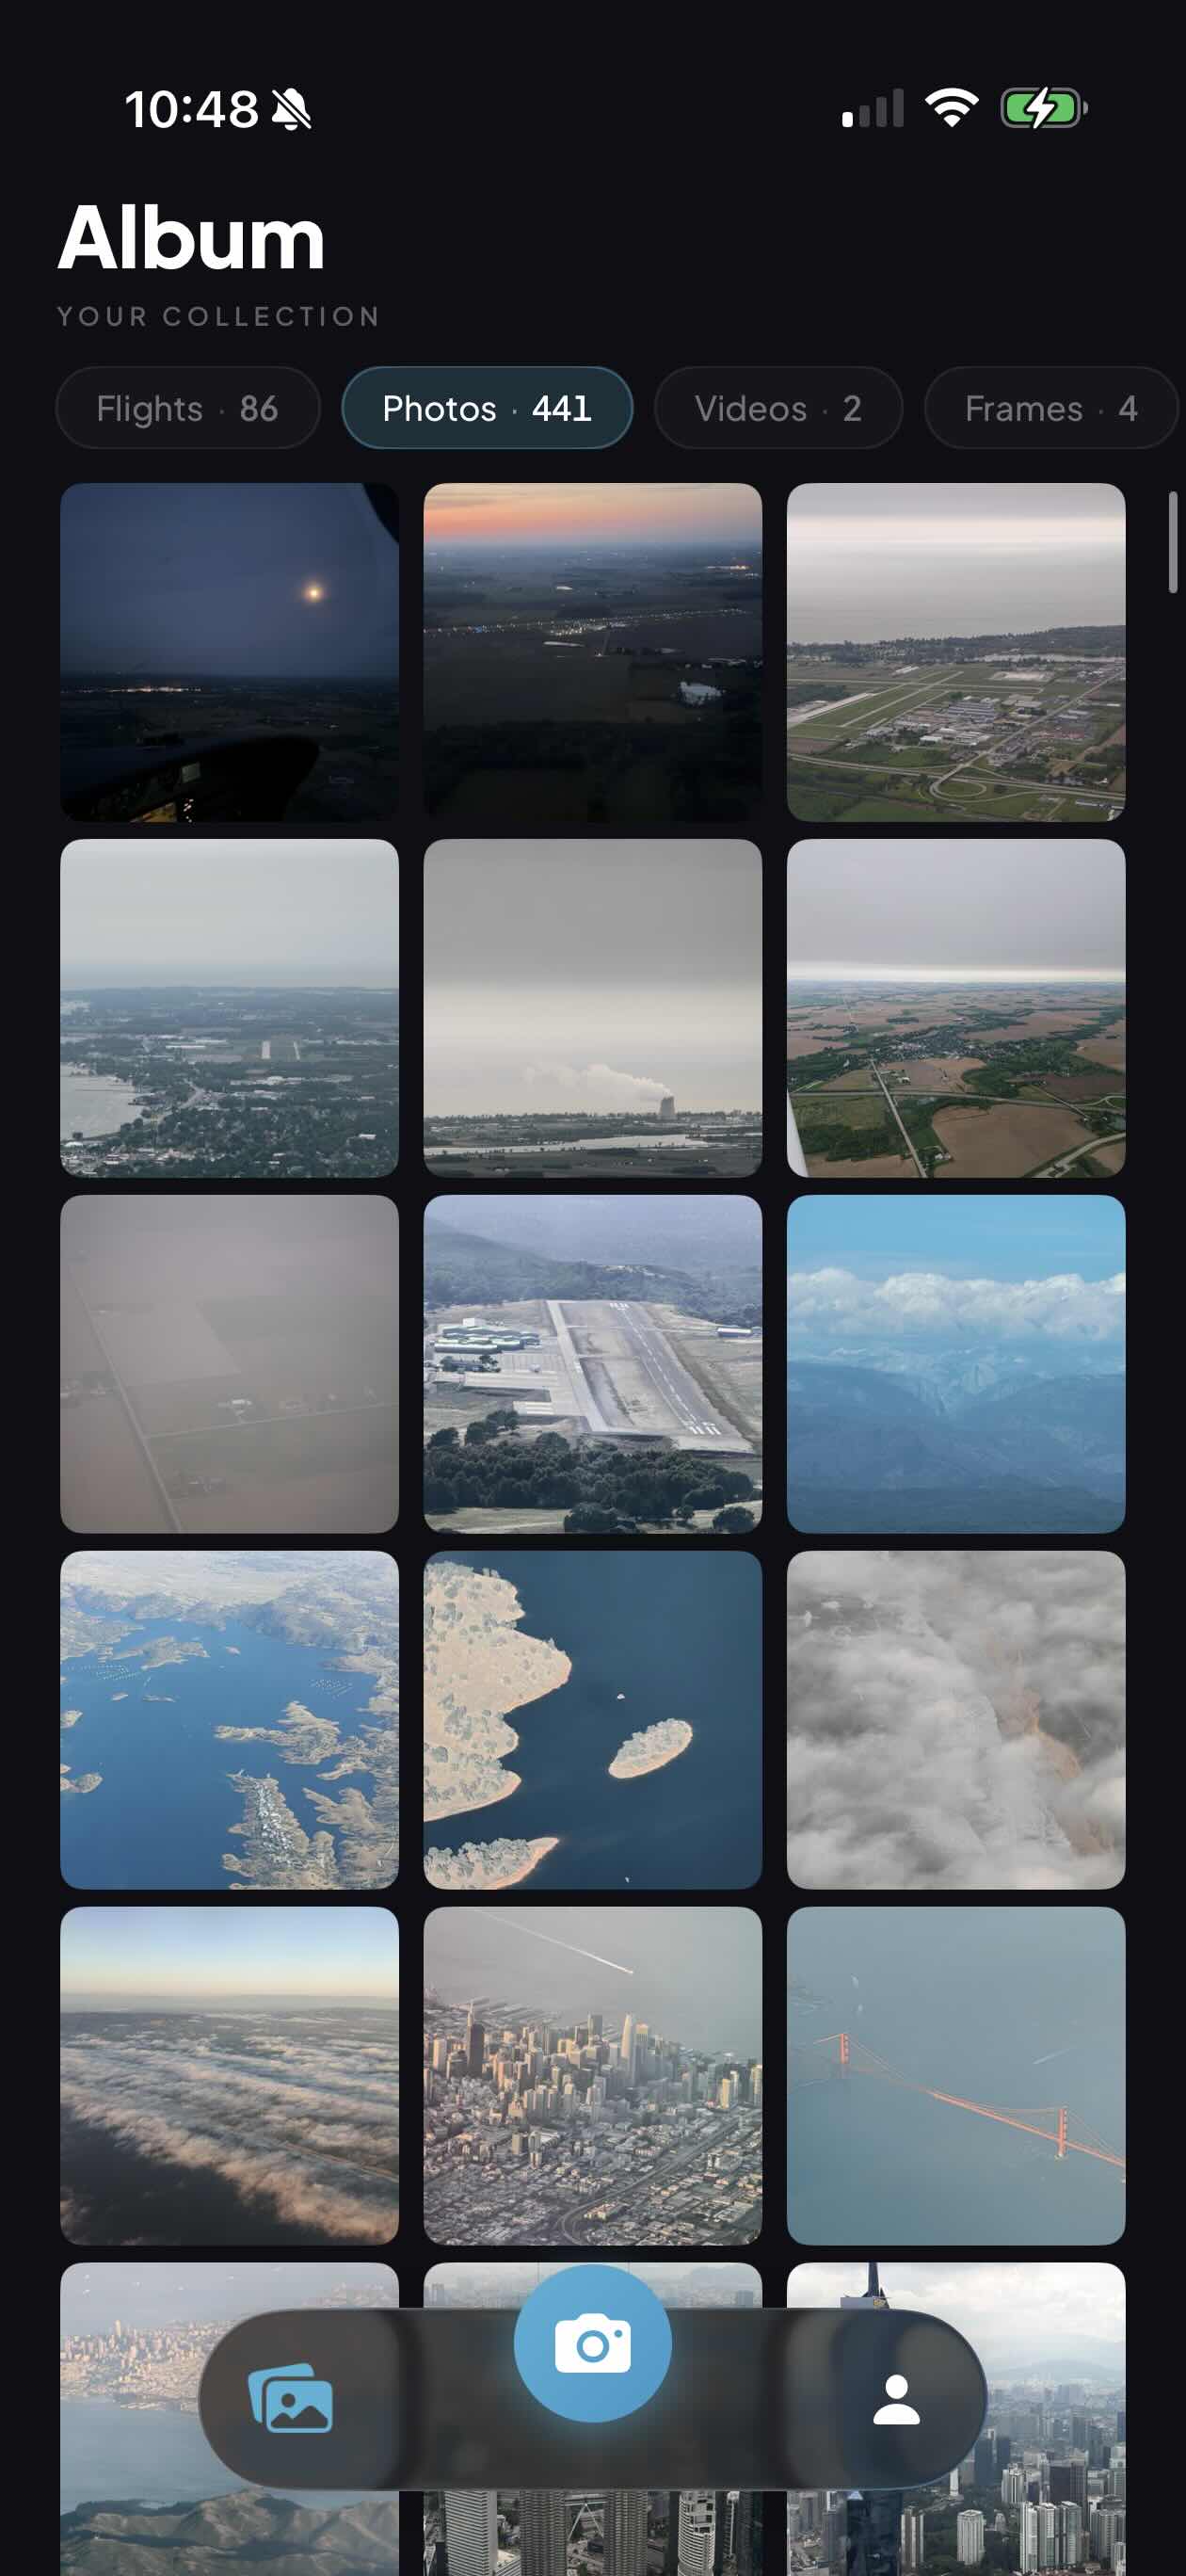
Browse Every Photo
Switch to the Photos tab to scroll your entire aerial gallery at a glance, from every flight you've ever logged.
10
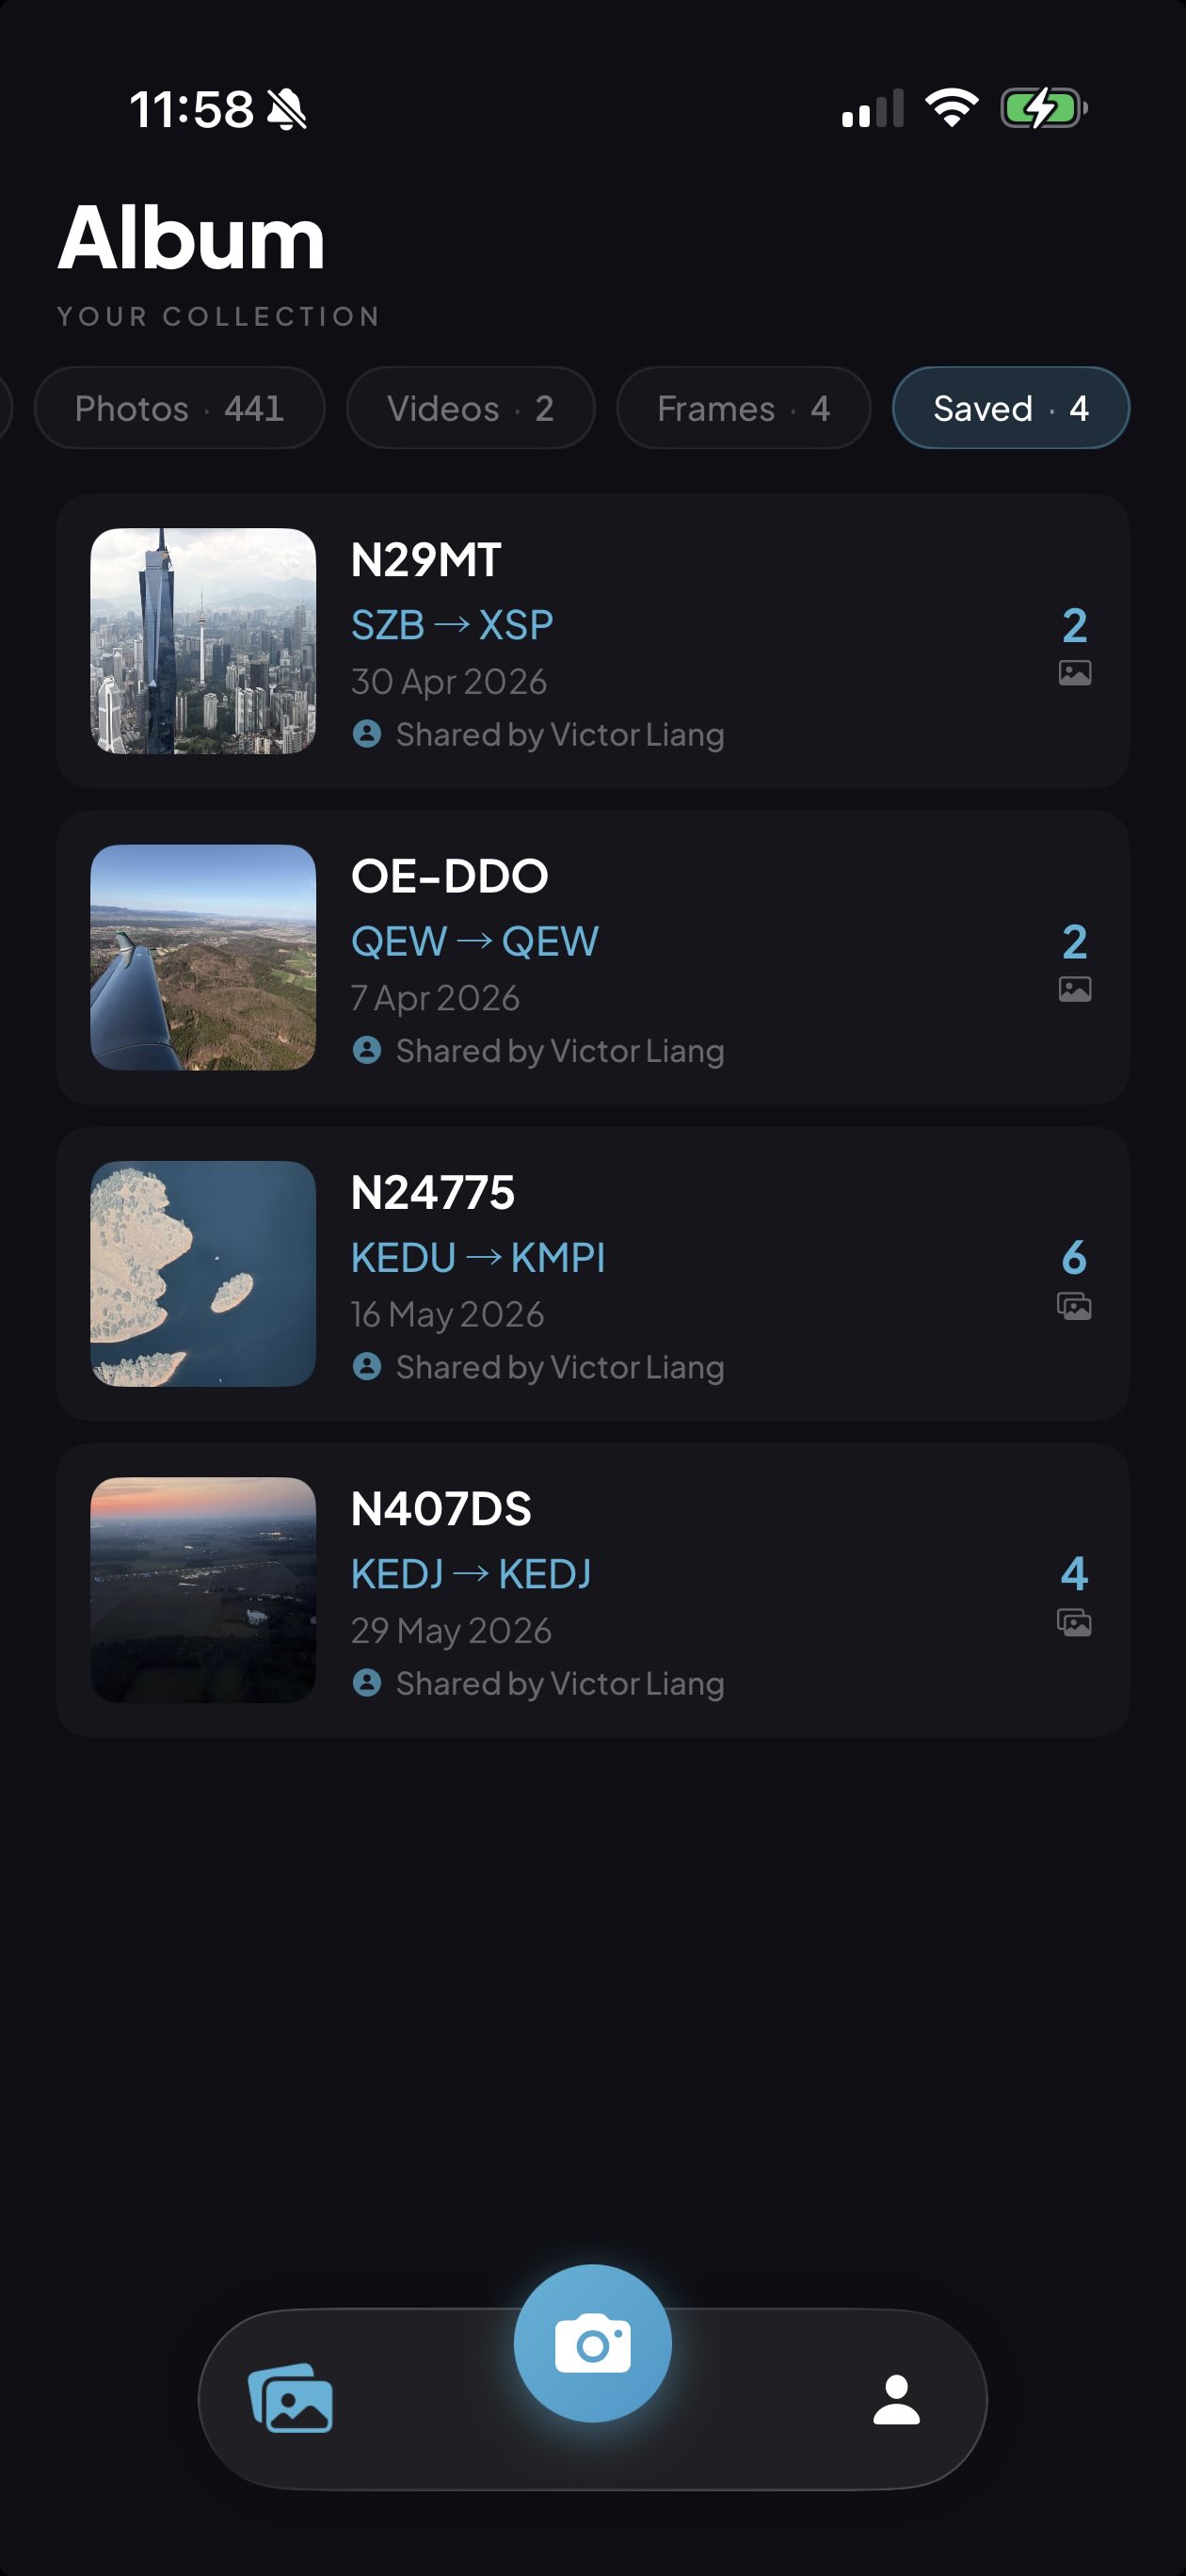
Share & Save Albums
Send a flight album to friends with a single link, and keep the albums they share with you. Saved albums live in the "Saved" tab, ready to revisit anytime.